Configuring CSV Enrichment Source involves two steps:
Go to Settings >> Configuration >> Enrichment Sources.
Click ADD.

Adding an Enrichment Source
Select CSV.
Enter a Name.
Select the Charset.
Select a Delimiter. It is the separator used in the CSV file.
In Upload Options:
7.1. Select File upload to provide a CSV file. Click Browse to search for a CSV file and click Upload.
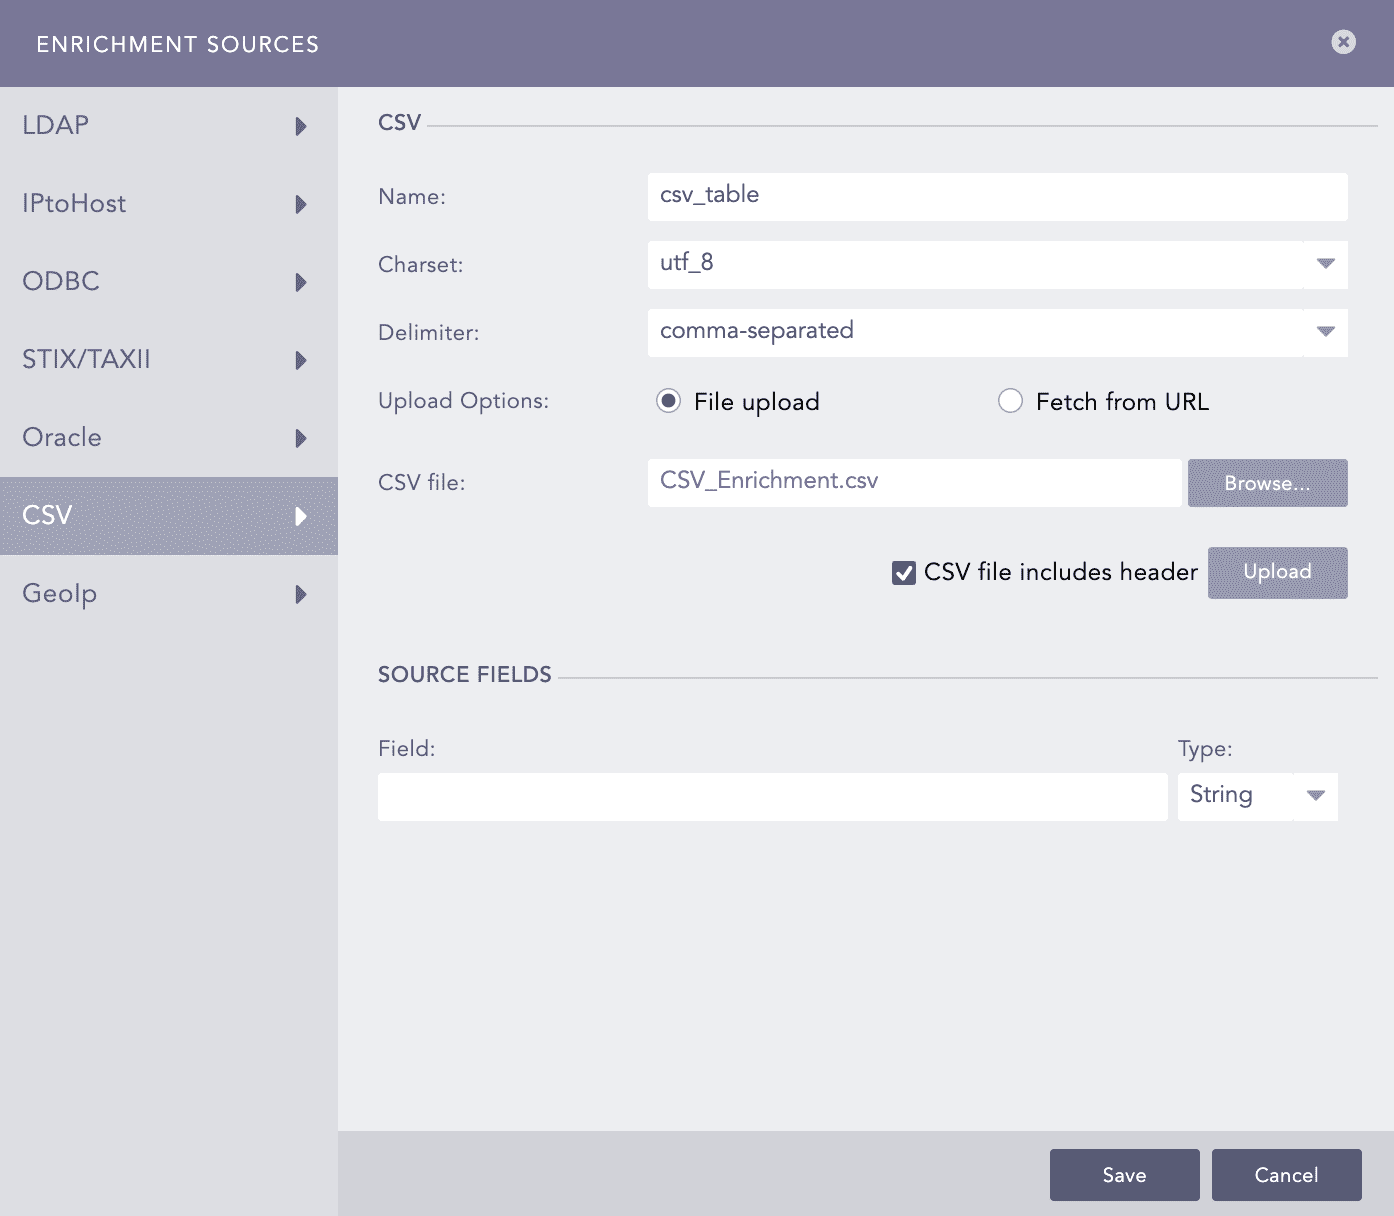
CSVEnrichmentSource - File Upload
7.2. Select Fetch from URL to upload a URL link to the CSV file.
7.2.1. Enter the CSV URL that links to the CSV File.
7.2.2. Select an Authentication method.
7.2.2.1. Select None if the provided CSV URL requires no authentication.
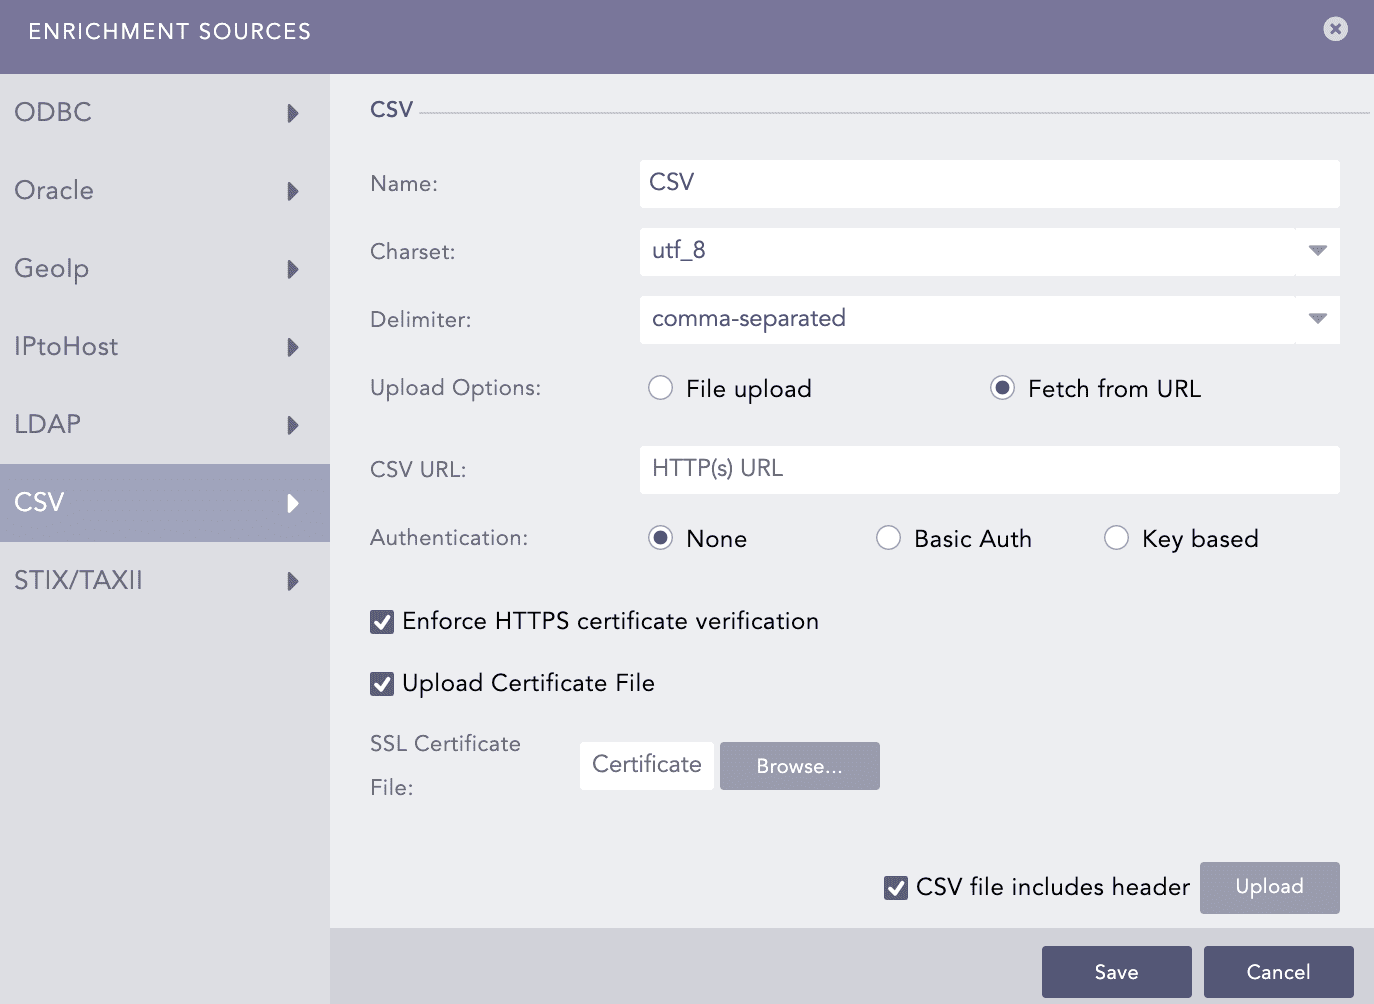
CSVEnrichmentSource - URL With No Authentication
7.2.2.2. Select Basic Authentication if the provided CSV URL requires basic authentication. To access the URL, provide your Username and Password.
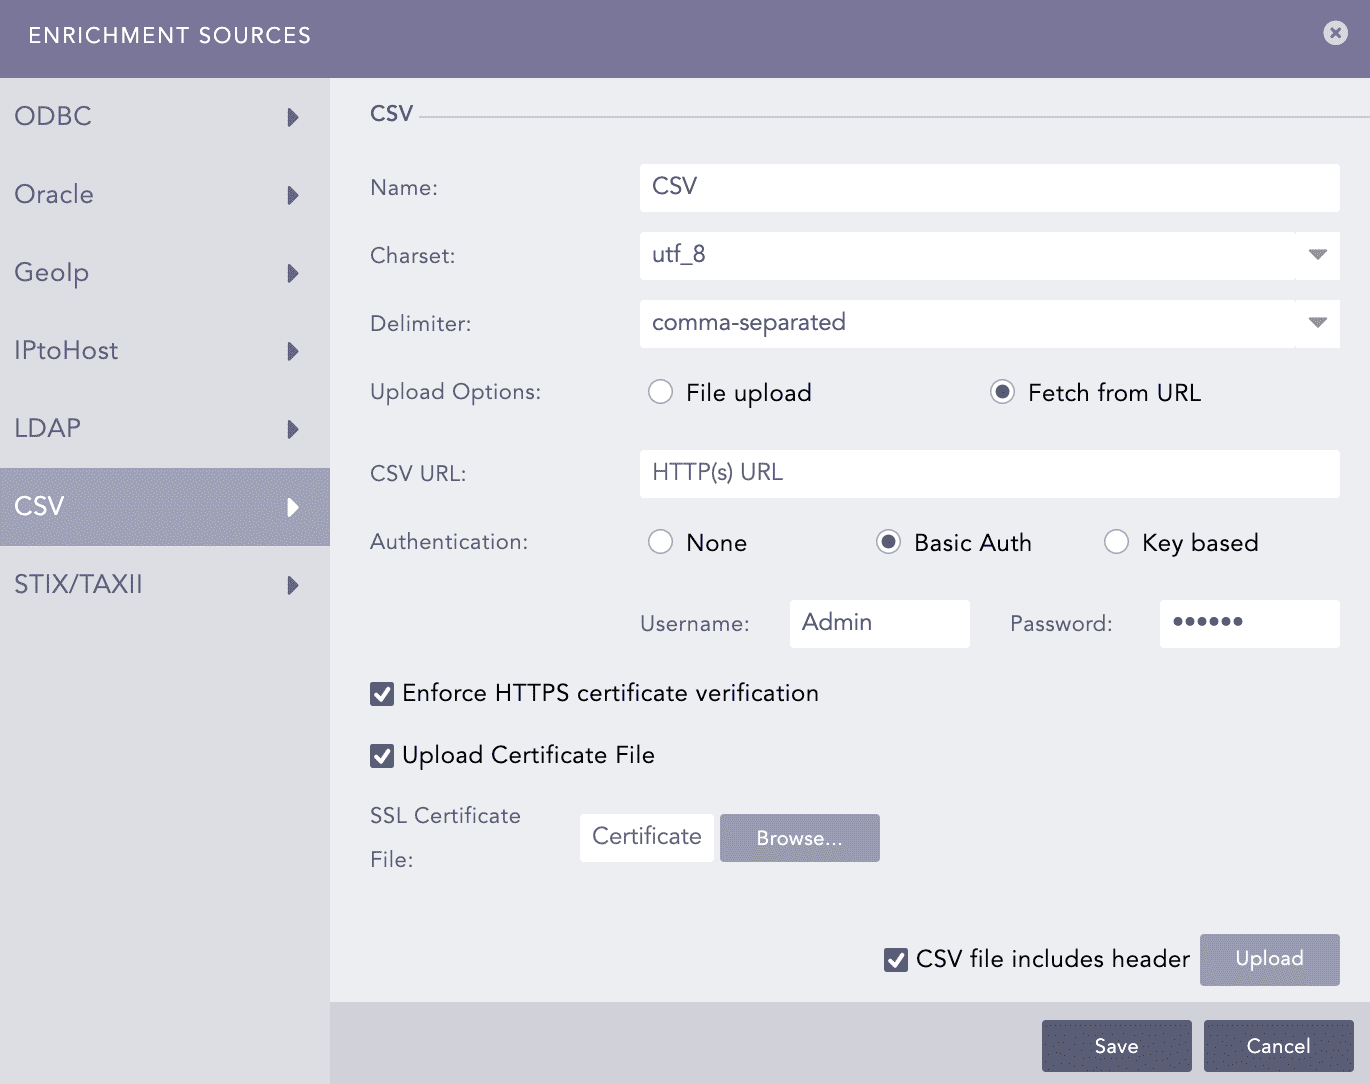
CSVEnrichmentSource - URL With Basic Authentication
7.2.2.3. Select Key Based Authentication if the provided CSV URL requires key-based authentication. To access the CSV file, provide your API Key.

CSVEnrichmentSource - URL With Key Based Authentication
7.2.3. Select Enforce HTTPS certificate validation to ensure a secure connection.
7.2.4. Select Upload Certificate File if the provided CSV URL uses a self-signed SSL certificate.
7.2.5. Browse to the location of the certificate and click Open.
7.2.6. In Enrichment Options, enter an Update Interval.
7.2.7. Click Upload.
Select CSV file includes header if the CSV file contains field headers. If the file does not contain field headers, CSV Enrichment Source assigns default header names as Column1, Column2, …, and ColumnN, where N is the number of columns in your CSV file.
If the file is uploaded successfully or if the connection to the server is successful, Logpoint stores the data in a table format, and SOURCE FIELDS displays all the columns of the fetched table along with the sample data.
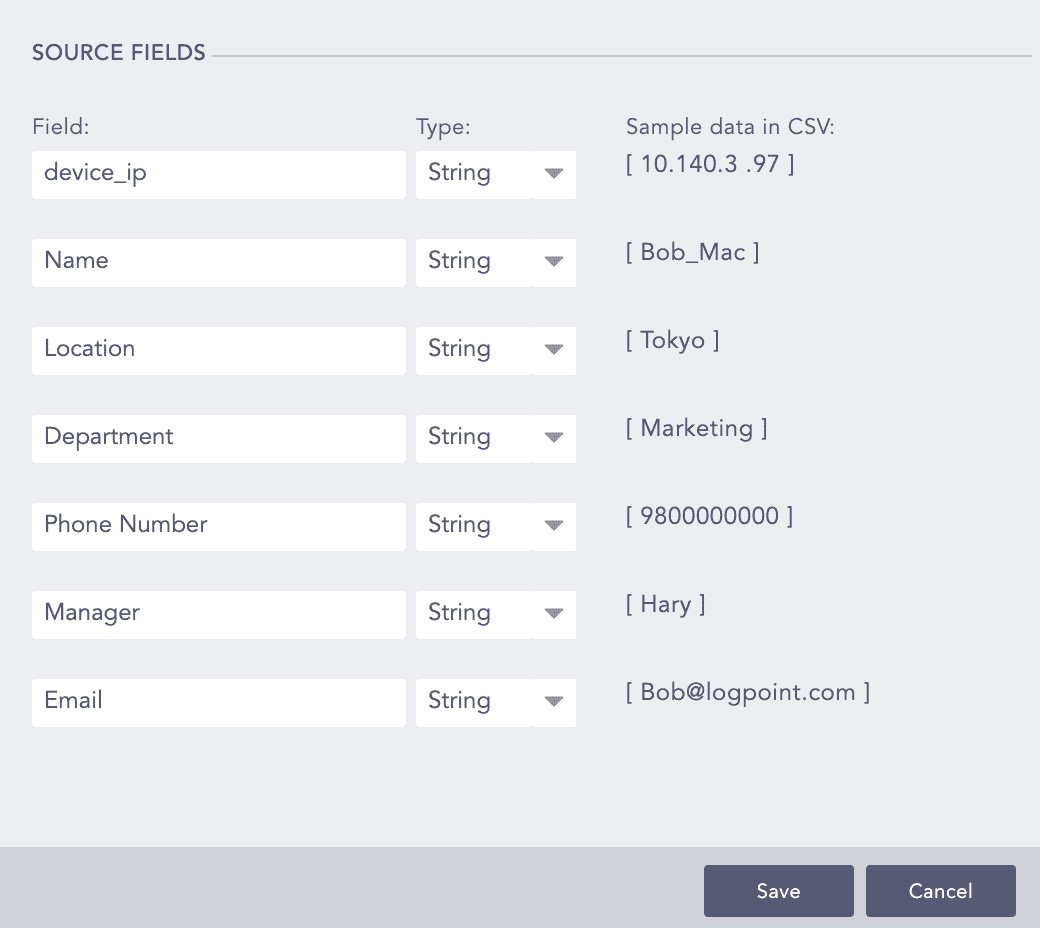
Table columns along with sample data
Select the Type of sample data from the drop-down.
Click Save.
After adding CSV enrichment source, Logpoint creates a table with the name you entered. To view the table:
Go to Settings >> Configuration >> Enrichment Sources.
Click Search ( ) icon from Actions. It will take you to the Logpoint Search. You can also view the table directly from Search using the Table query.

Searching the CSV table
After verifying the presence of an enrichment table, you can add new enrichment policy using that table. To do so, go to Adding Enrichment Policy.
In the example below, you can see csv_table used as an Enrichment Source. If the value of source_ip_address from the log matches the value of device_ip from the enrichment table, Logpoint enriches the log using the data from the table.
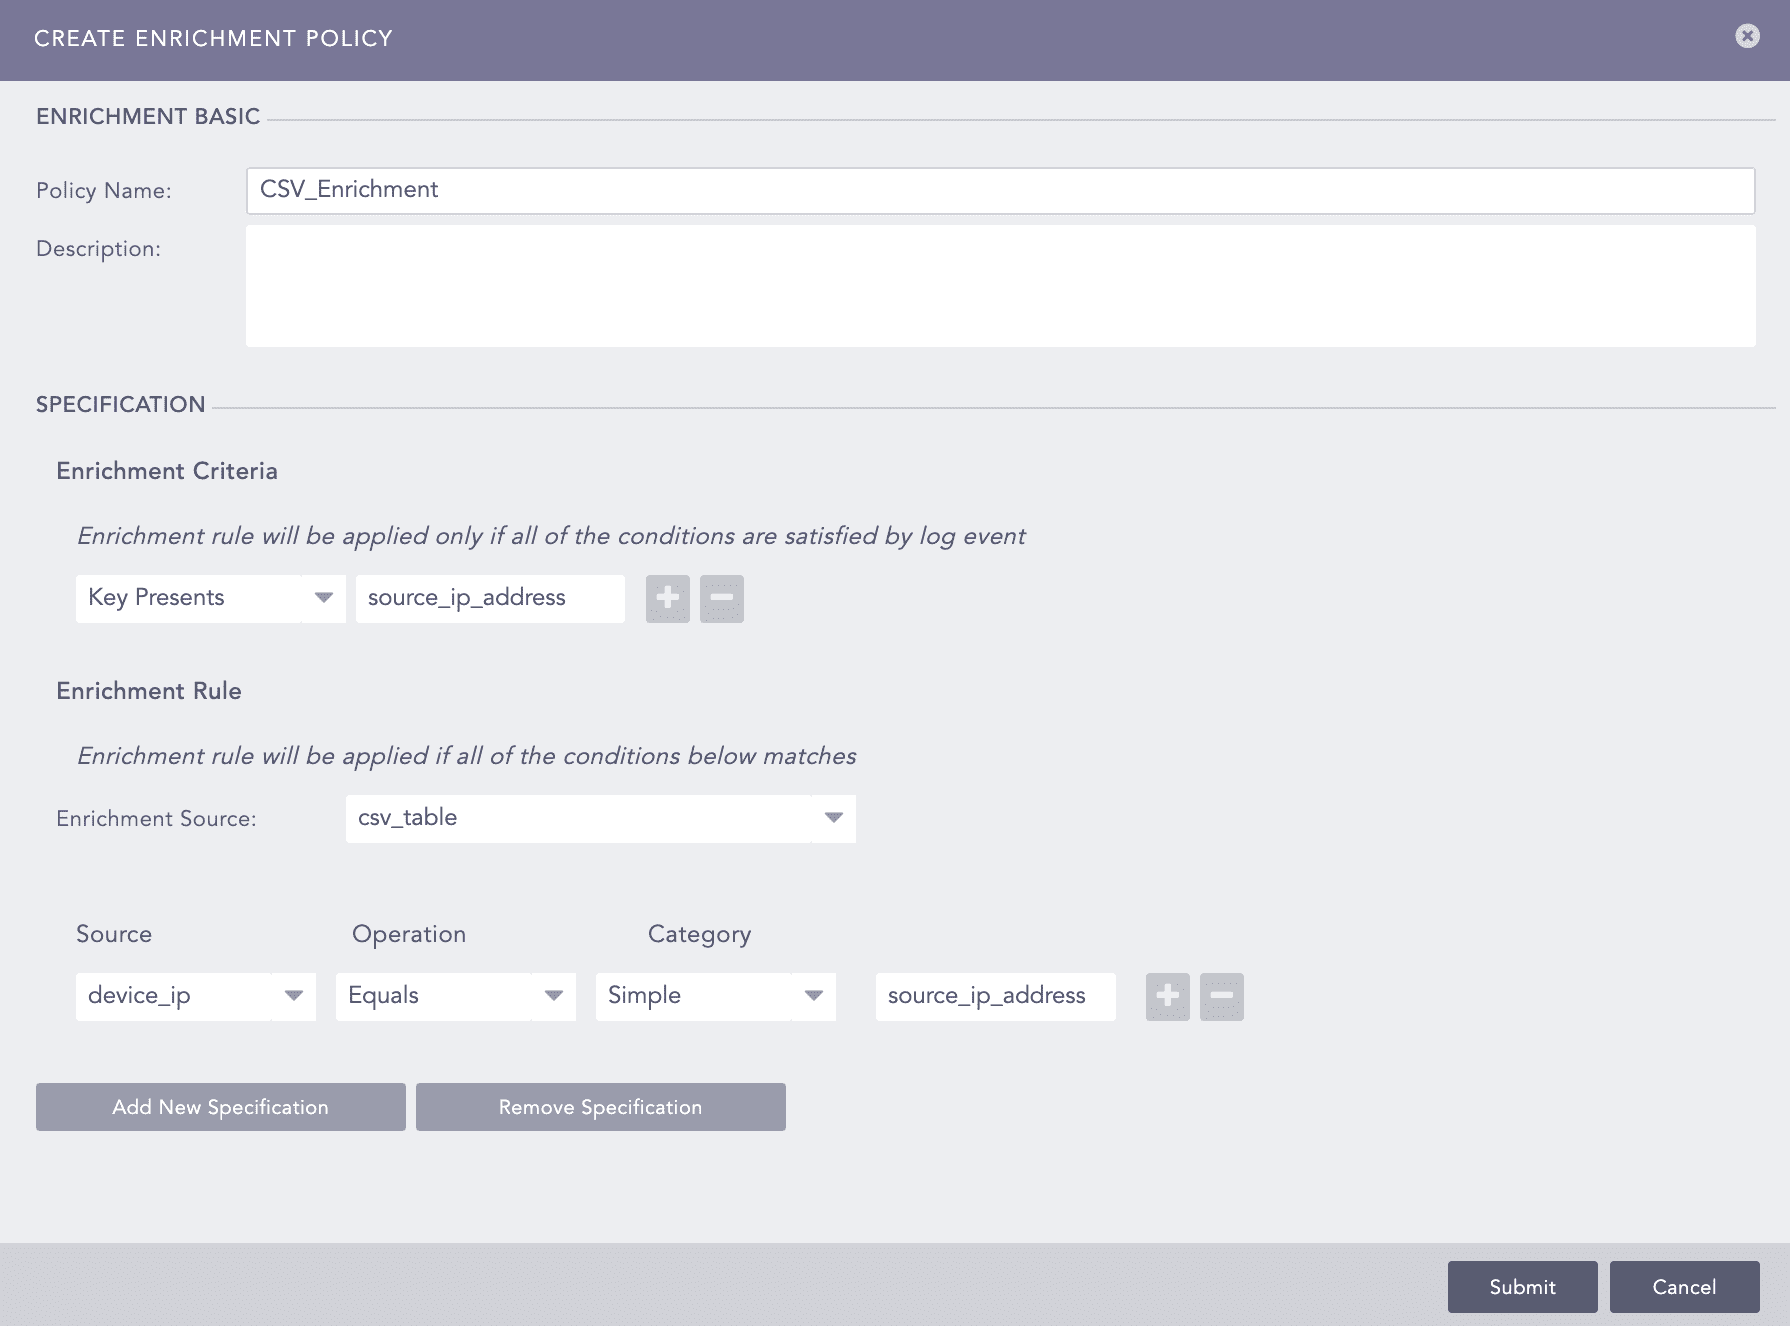
Adding Enrichment Policy using CSV Source